
For the last few weeks we have been experimenting with LoRaWAN hardware. We have setup some temporary gateways here and there going around in Athens (wardriving) checking the LoRa signal strength and range advantages. At the same time we are building our own low cost, outdoor, power over ethernet LoRaWAN gateways for TTN-Athens which is based on Raspberry Pi 2 and the IMST iC880A concentrator. We used Lorank-8 (BeagleBone Green + iC880A based) and the TTN-Zurich source code as a guide. We have one of our gateways running outdoor for about a month now without any problems therefore we can assume that our approach is decent enough to publish.
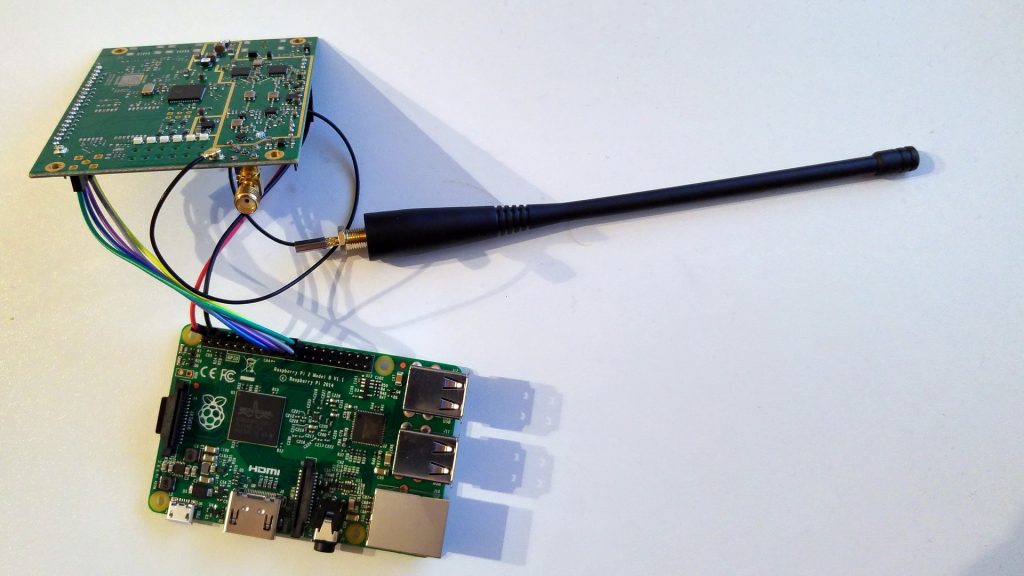
We started by connecting an iC880A to an RPi via SPI, we soldered a SMA PCB plug and executed the TTN-Zurich instructions. Everything worked smooth on the software side, however the received signal strength of the gateway was ridiculous. After spending a few hours testing various antennas, cables, SMA plugs, etc, we realized that near the SMA plug there is an extremely small SMD jumper (0 ohm resistor?) that we need to resolder to a different location in order to switch from U.FL connector to the SMA plug. We used two soldering irons to successfully perform this tricky operation, however, a few days later we decided that we actually need the U.FL connector so we switch it back to the original location.
![]()
Having sorted the signal strength issues, we worked on the power supply side. Initial idea was to use a passive power over ethernet adapter and through 5V directly on the UTP spare lines. I mean, how much voltage drop would ~30 meters of UTP cable create ? …eehhh… 0.6V to be exact! As a result, we could not boot the RPi even with our best 5.1V power supplies since the end voltage on the RPi was ~4.5V or lower.
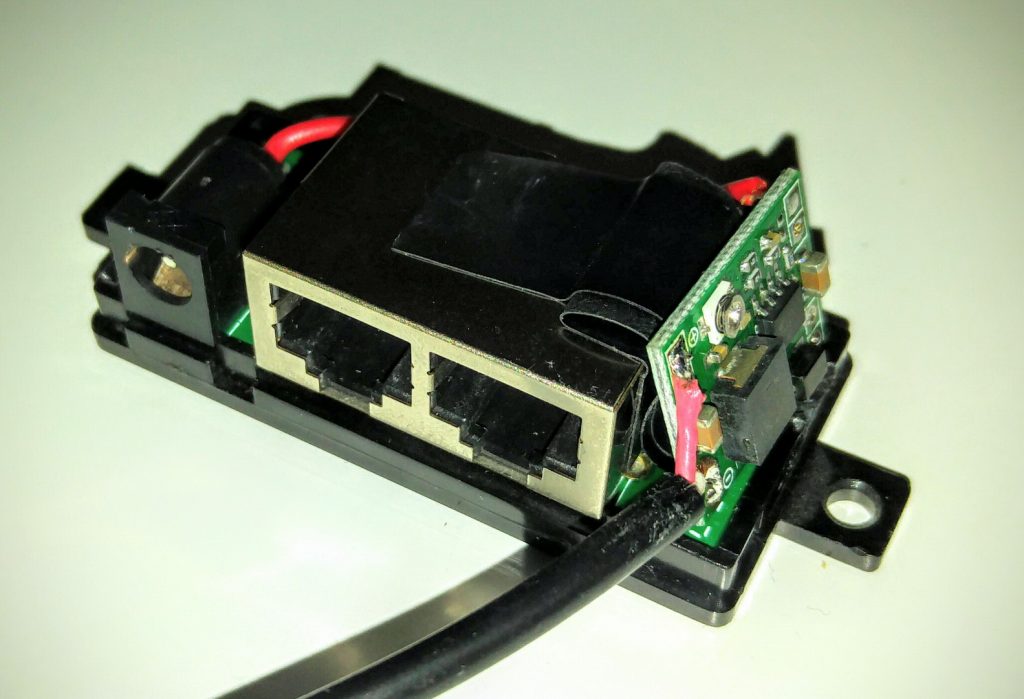
New strategy was to increase voltage and go for a DC to DC step down module in the gateway enclosure. Our friends in Shenzhen have flooded the market with extremely low cost voltage regulation modules and we have loads spare ones from previous projects. We selected this Mini-360′ buck converter which costs 0.4€ fits just perfect in an PoE adapter (1€).
Input voltage: 4.75V-23V
Output voltage: 1.0V-17V
Current output: peak 3A, 1.8A normal
Transfer efficiency: 96% (highest)
Switching frequency: 340KHz
Output ripple: 30mV(no-load)
Load regulation: ±0.5%
Voltage regulation: ±2.5%
Operating temperature: -40~+85
Went for 12V on the UTP cable and adjusted the DC module for 5.1V on the RPi and boom! everything works perfect. The DC module does not get any warm, so I guess it is impressively efficient!
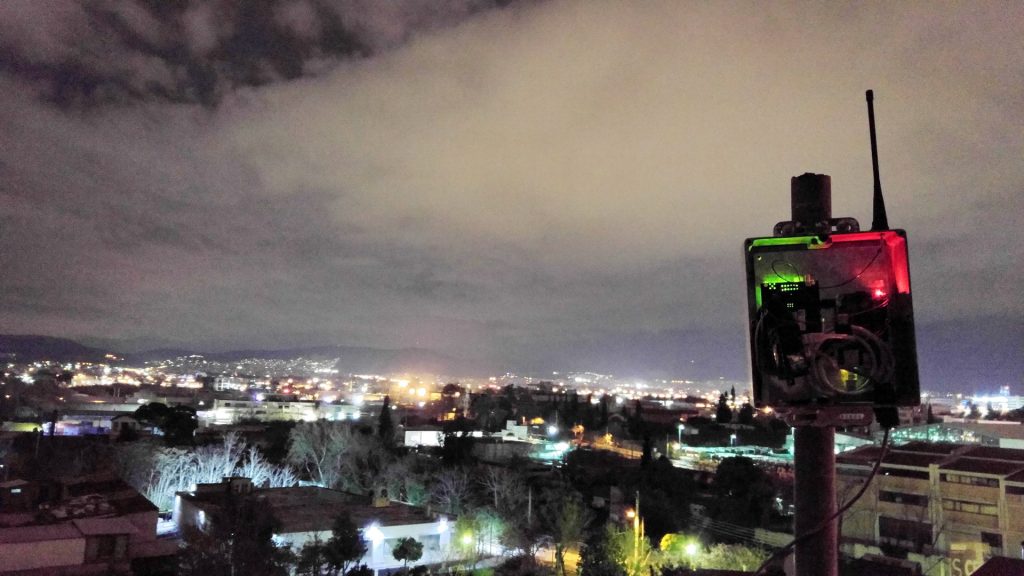

We have put everything in a waterproof cast aluminium case and placed it on a roof of a building in a strategically selected location in Athens center.
Total cost ~300€
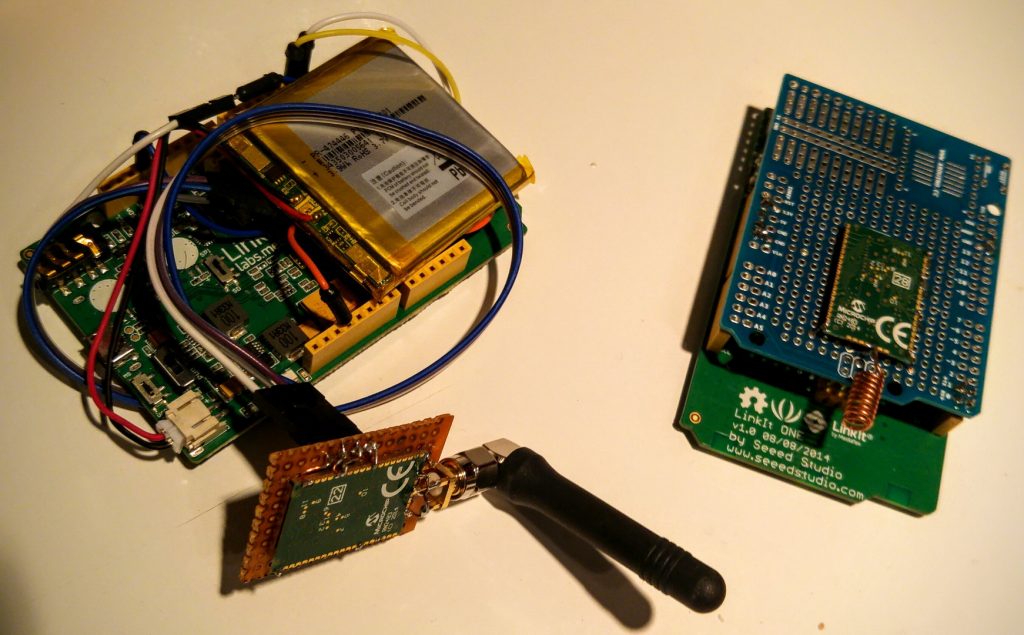
Now it’s time to test the range with a few battery operated LoRaWAN nodes. We have build our own multipurpose Arduino compatible super nodes which support GPS / GSM / WIFI / Bluetooth and LoRaWAN (!) based on Mediatek LinkIT ONE with the addition of Microchip RN2483 on a prototype shield with a DIY helix antenna.
Forked the source code of TTN Arduino Uno and started playing with the power index and spread factor, data rate of LoRaWAN. Since the adaptive mode of LoRaWAN is not yet implemented on TTN servers, we wanted to hardcode the best possible setting on the nodes before we test their range.
Apparently that is achieved with:
mac set dr 0

mac set pwridx 1
Early tests indicate a through-buildings urban range of more 1km+ with the compact helix antenna which is amazing when compared to traditional wireless technologies and 2km+ with better but still compact antennas. Next step is to create a signal visualization on a map using >TTN mapper and try better antennas on the gateway as well.
Stay tuned for updates https://twitter.com/ExMachinaHQ.
MN